· react native · 6 min read
How to use expo-updates to quickly update React Native applications - Part 1
Releasing and updating applications quickly is a necessity. In this article, I will show you how to use expo-updates to quickly update released applications.
Challenges
When releasing applications on the Android and iOS stores, sometimes it takes a lot of time and effort because of the censorship process, sometimes your app is rejected for very silly reasons. In fact, I did a project where the app had to go through a review and revision process that took 2 months. Sometimes, after releasing the app to the store, we discover a few small bugs, but in order for these bug fixes to reach users, we have to go through a censorship process that takes time, effort, and money of project.
However, that’s still good because the app can still be automatically updated based on the store. I once made an application that was not released directly through the store but had to go through Apk file and MDM (Mobile Device Management). The application cannot be automatically updated but must be done manually from the customer’s side, making the version update process take a lot of time and effort (such as having to contact each customer to update themselves). This raises the issue of multiple versions of an application and having to maintain backward compatibility between versions. This maintenance will increase the effort for development and testing, thereby increasing costs and reducing the speed of application development.
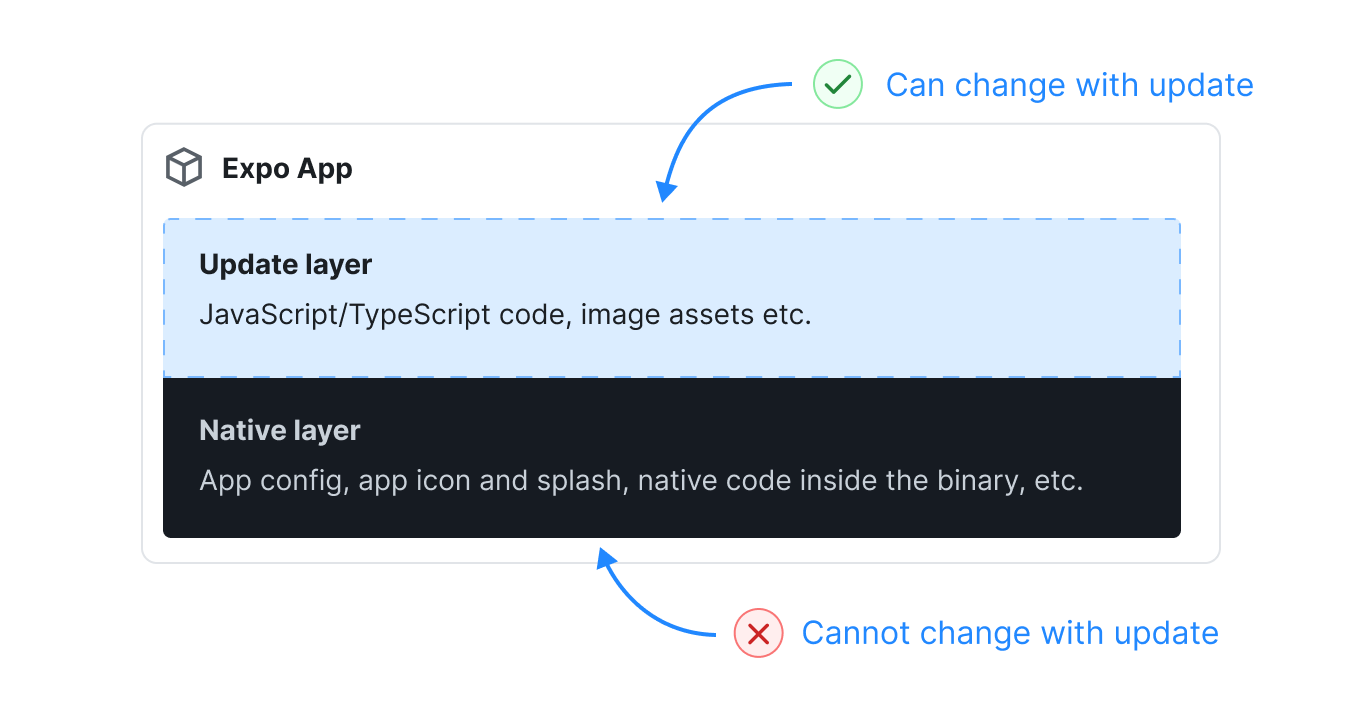
To solve this problem, many React Native libraries allow for asynchronous updates of Javascript logic code and resources such as images independently of native parts without going through the store. Two of the currently prominent libraries are react-native-code-push and expo-updates. However, since react-native-code-push uses *appcenter which will be closed in March 2025, so I will use and introduce expo-updates .
How to use expo-updates
Initialize projects
1. Install EAS CLI and log in to your Expo account
First, to initialize the project, we need to install the EAS CLI and expo. Then log in with the expo account you created.
npm install --global eas-cli
eas login
2. Create a new projec
To create a new project, we will use the command below:
npx create-expo-appWhen successfully creating a new project, the project’s folder structure will be as follows:
.
|-- README.md
|-- app
|   |-- (tabs)
|   |   |-- _layout.tsx
|   |   |-- explore.tsx
|   |   `-- index.tsx
|   |-- +html.tsx
|   |-- +not-found.tsx
|   `-- _layout.tsx
|-- app.json
|-- assets
|-- babel.config.js
|-- components
|-- constants
|-- hooks
|-- package-lock.json
|-- package.json
|-- scripts
`-- tsconfig.json
3 Configure the project and connect to the Expo service
To configure the project to use expo-updates and connect to the expo service, we will briefly use the following commands in the project directory
npx expo install expo-updates
eas update:configure
eas build:configure
After running the above commands, we will have a new file eas.json in the root directory.
{
  "cli": {
    "version": ">= 10.1.0"
  },
  "build": {
    "development": {
      "developmentClient": true,
      "distribution": "internal",
      "channel": "development"
    },
    "preview": {
      "distribution": "internal",
      "channel": "preview"
    },
    "production": {
      "channel": "production"
    }
  },
  "submit": {
    "production": {}
  }
}
In this eas file we will need to pay attention to the build section. In this config there will be many profile corresponding to environments such as development, preview, production. In each profile there will be information about the corresponding channels. expo-updates will use information from these channels to update the application.
4. Test application
After this step, we have created a simple codebase for the application. We can test whether the configuration is ok or not by running the application through the commands:
npm run start
If everything is okay, the result will be as shown below. Now it depends on the platform the project needs to choose next.
> my-app@1.0.0 start
> expo start

Starting project at ~/Projects/my-app
Starting Metro Bundler

› Metro waiting on exp://192.168.10.17:8081
› Scan the QR code above with Expo Go (Android) or the Camera app (iOS)

› Web is waiting on http://localhost:8081

› Using Expo Go
› Press s │ switch to development build

› Press a │ open Android
› Press w │ open web

› Press j │ open debugger
› Press r │ reload app
› Press m │ toggle menu
› Press o │ open project code in your editor

› Press ? │ show all commands
5. Build the application in preview profile
To test build an android application for preview profile using expo, we will use the following command:
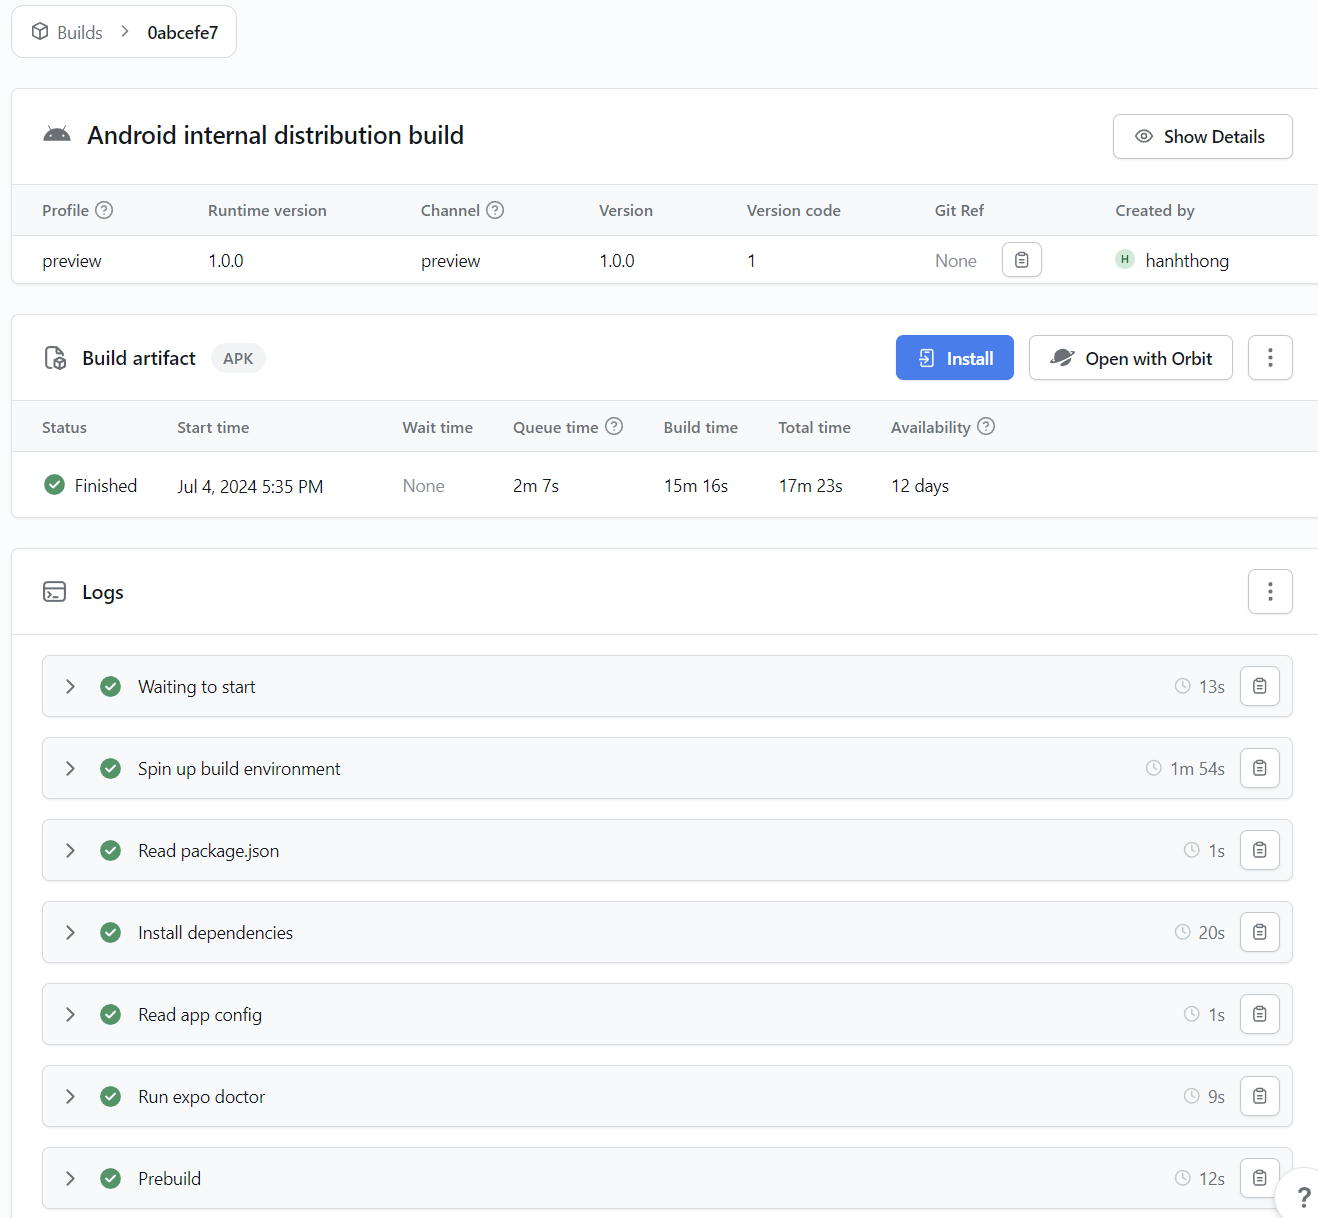
eas build --platform androidThis command will run on expo service which will take almost 15 minutes to complete for the free version. Build speed may be faster for the paid version. You can also build the app locally by running eas build —platform android —local. However, this local build will be relatively complicated and will require many things to be installed. I will write in detail in another article.
After running the command, the build file will be available on Expo like the image below.
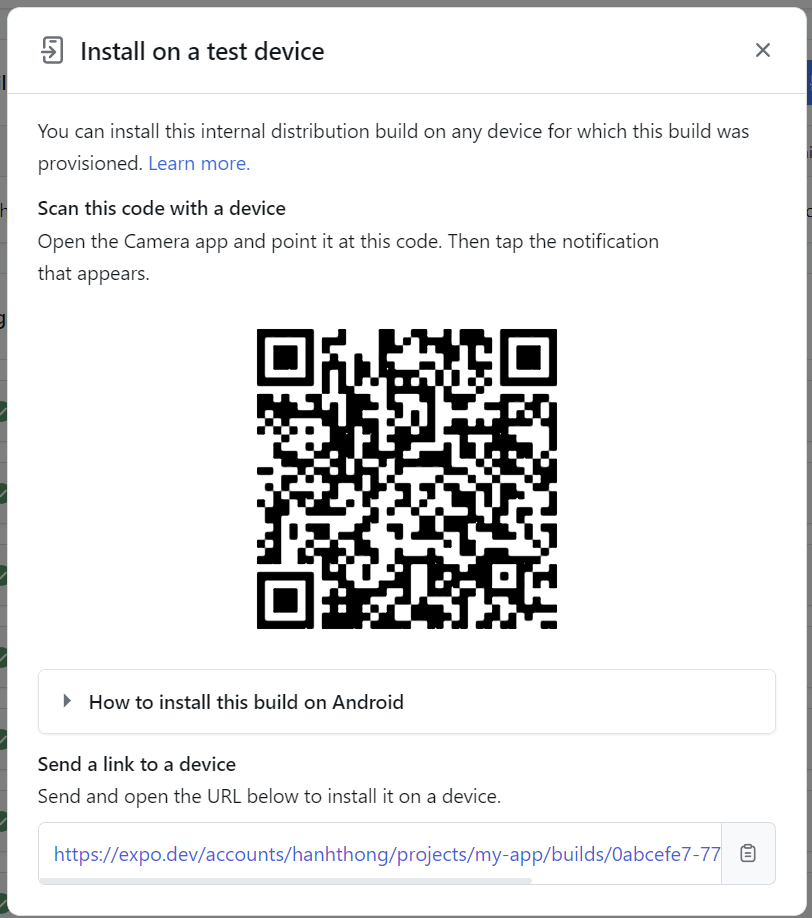
To test the application, we click the Install button and scan the QR code to download to the phone.
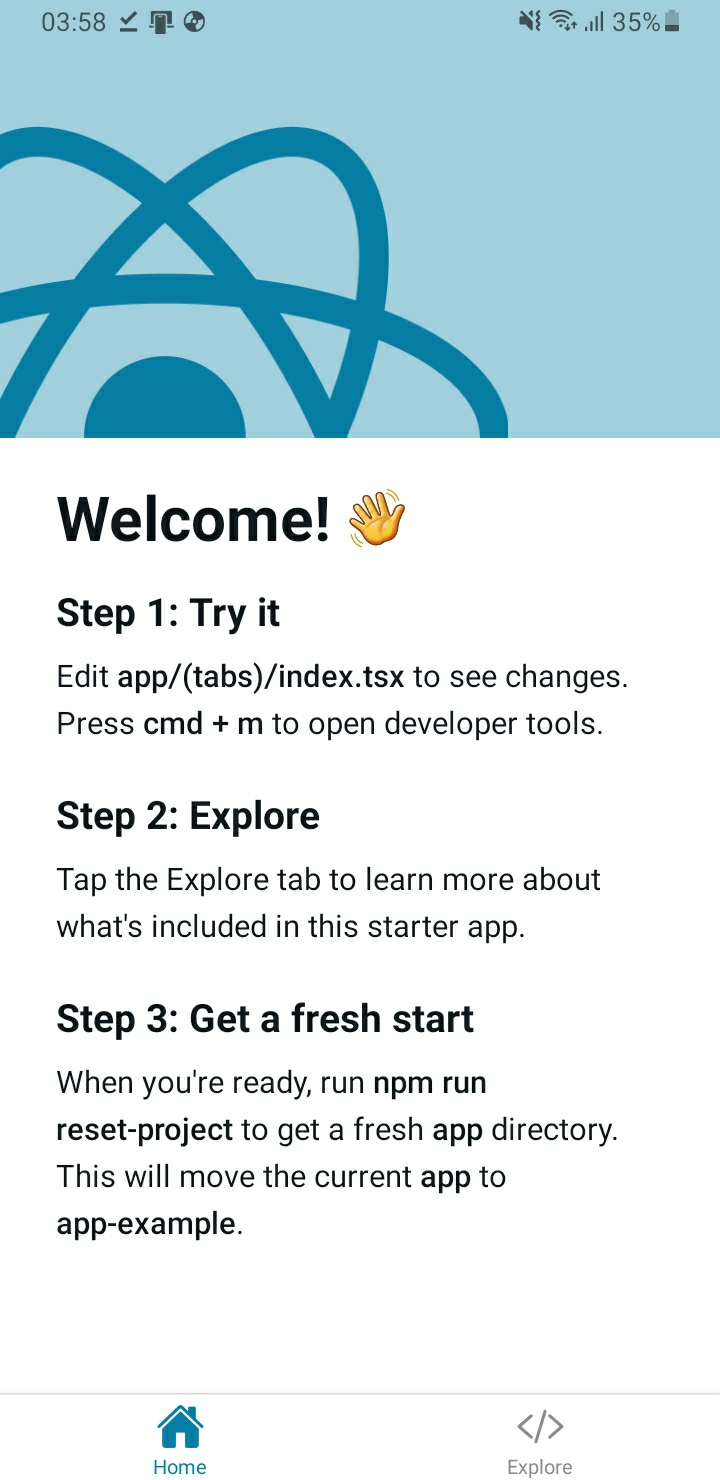
After installation is complete, the application will look like the following image.
6. Application changes and updates
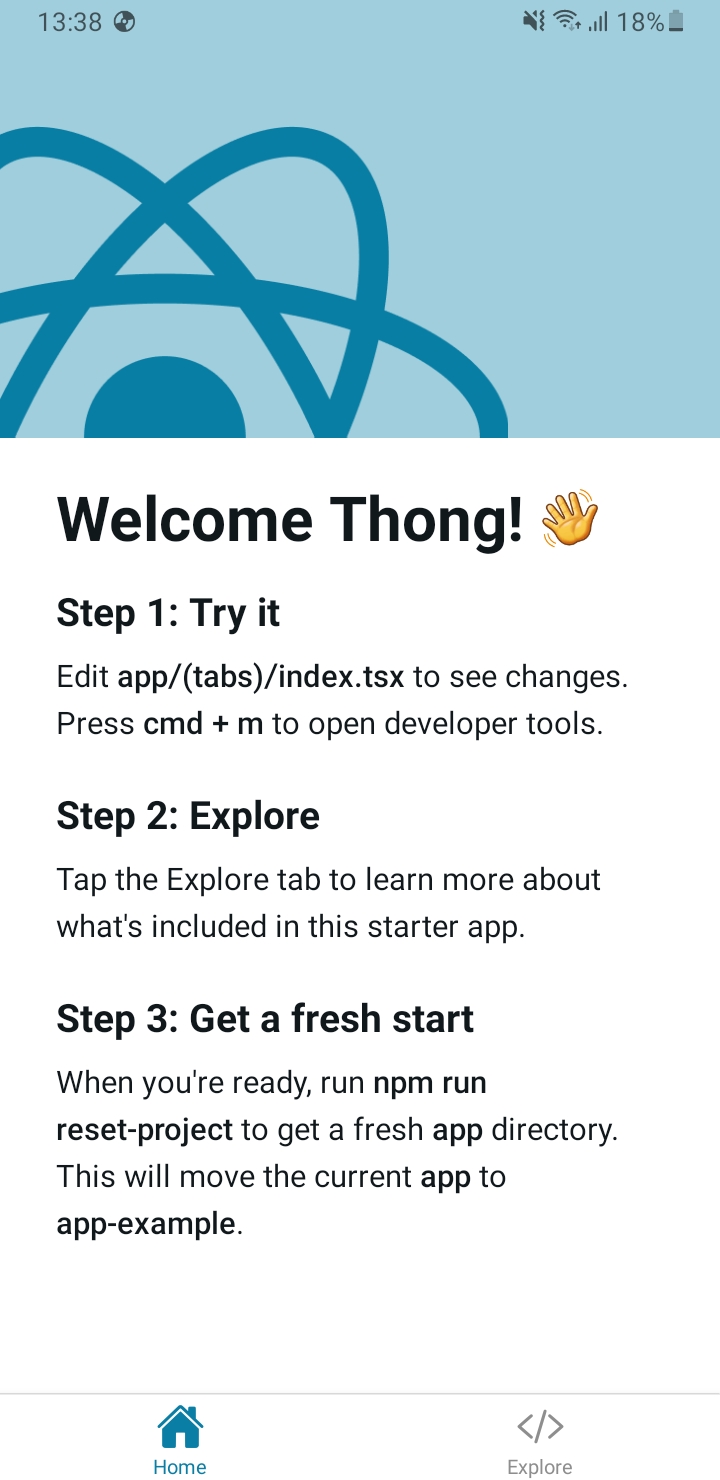
In this part, I will try to change a small text on the Home page to test the functionality.
<ThemedView style={styles.titleContainer}>
- <ThemedText type="title">Welcome!</ThemedText>
+ <ThemedText type="title">Welcome Thong!</ThemedText>
  <HelloWave />
</ThemedView>
After that, we will create a new update using the following command for preview profile.
eas update --message "Update welcome text" --channel preview
At this point, we can close the app and reopen it to download the new bundle file. Then close the app again and open the app again. New versions of the application will be updated.
Conclusion
In this article, I introduced how to use expo-updates to quickly update asynchronous applications without going to the store. In this article, there is a limitation that my application must depend on expo’s service to build the app and release updates. expo-update allows us to build local apps without using a service and release our own updates without using expo-updates. I will do this part next in this series. Additionally, in this article, we will create the project from scratch using expo, but in reality we may have to install it into an existing project and that project may not use expo. I will write another article about this issue.