· windows powershell tips · 5 min read
How to make Powershell more friendly with Oh My Posh
When working with Linux, Mac terminals, the work is very easy with Zsh and its plugins such as Oh My Zsh and Zsh Autosuggestion. It makes my working efficiently. After that, I switched to Windows Powershell and always felt like something was missing. After some research, I discovered Oh My Posh with the same ability to customize the interface like Oh My Zsh. In this article, I will show you how to set up Oh My Posh on Windows for a better working experience.

Challenges
PowerShell is a command line tool on Windows operating systems. However, it has some limitations and problems that users often encounter. Below are some common PowerShell problems:
- Unattractive interface: By default, the PowerShell interface can look boring and unattractive, especially when compared to other modern command shells like Zsh on macOS and Linux
- Useful information: PowerShell by default does not provide much useful information on the command line such as the status of the Git repository, current branch name, or status of the Python environment
- Difficulty editing: PowerShell’s customization interface can be complex and requires users to have in-depth knowledge of configuration
When I switch from Linux/Mac with bash/zsh to Powershell, I feel very cramped for the above reasons. However, luckily after a while of searching, I found that Oh My Posh is similar to Oh My Zsh with many customizations, information and interface. However, the installation process is a bit confuse compared to Oh My Zsh, so I decided to Writing this article to guide and shorten the time to access this tool.
How to install Oh My Posh
On the homepage of Oh My Posh, many methods are listed, in this article I will only share how I installed it on my device.
1. Install Oh My Posh
To install, you run as Administrator
Set-ExecutionPolicy Bypass -Scope Process -Force; Invoke-Expression ((New-Object System.Net.WebClient).DownloadString('https://ohmyposh.dev/install.ps1'))At this point, you can run the following command to check the result:
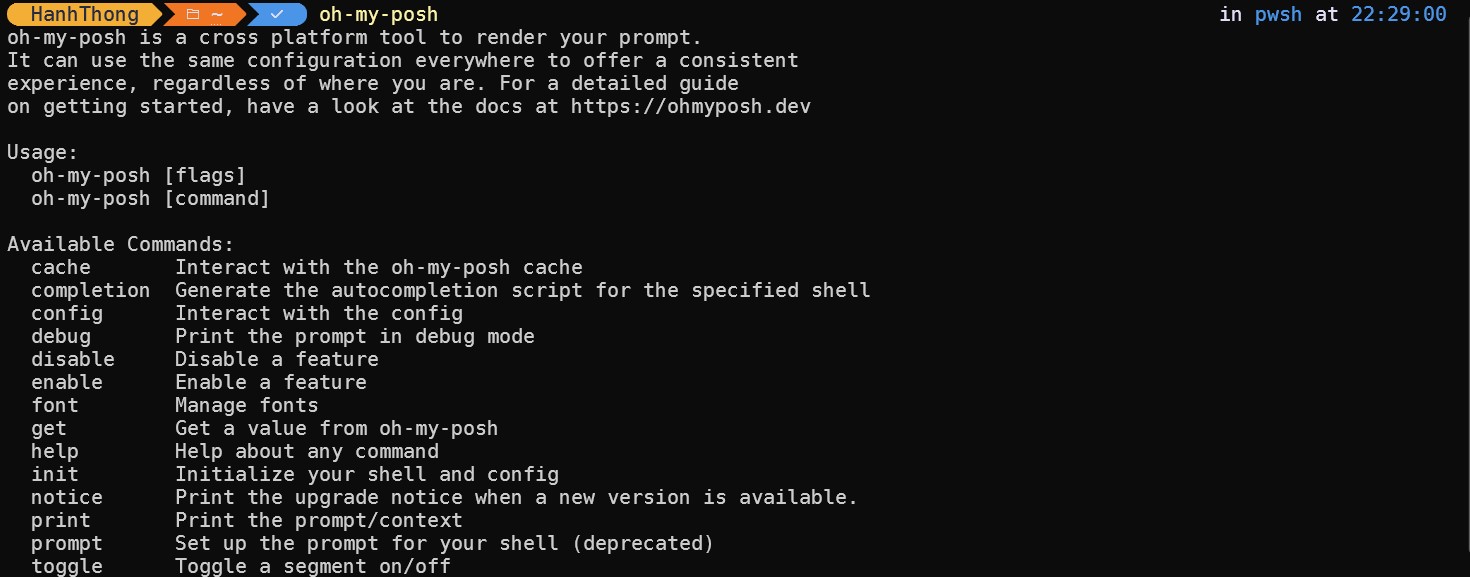
oh-my-poshIf the result looks like below, it means your initial steps were successful.
oh-my-posh is a cross platform tool to render your prompt.
It can use the same configuration everywhere to offer a consistent
experience, regardless of where you are. For a detailed guide
on getting started, have a look at the docs at https://ohmyposh.dev

Usage:
  oh-my-posh [flags]
  oh-my-posh [command]

Available Commands:
  cache       Interact with the oh-my-posh cache
  completion  Generate the autocompletion script for the specified shell
  config      Interact with the config
  debug       Print the prompt in debug mode
  disable     Disable a feature
  enable      Enable a feature
  font        Manage fonts
  get         Get a value from oh-my-posh
  help        Help about any command
  init        Initialize your shell and config
  notice      Print the upgrade notice when a new version is available.
  print       Print the prompt/context
  prompt      Set up the prompt for your shell (deprecated)
  toggle      Toggle a segment on/off
  upgrade     Upgrade when a new version is available.
  version     Print the version
2. Install theme
To install the theme for Oh My Posh, you can go to this link to preview and choose a theme to download. In this article, I chose the atomic theme.
mkdir ~/.oh-my-posh/
wget https://github.com/JanDeDobbeleer/oh-my-posh/blob/main/themes/atomic.omp.json -OutFile ~/.oh-my-posh/atomic.omp.json
At this point, you can run the following command test apply new theme.
oh-my-posh init pwsh --config ~/.config/oh-my-posh/config.omp.json | Invoke-ExpressionIf running this command gives an error like below:
& : File C:\Users\HanhThong\AppData\Local\oh-my-posh\init.26.20.1.default.1072.ps1 cannot be loaded because running
scripts is disabled on this system. For more information, see about_Execution_Policies at
https:/go.microsoft.com/fwlink/?LinkID=135170.
At line:1 char:3
+ & 'C:\Users\HanhThong\AppData\Local\oh-my-posh\init.26.20.1.default.1 ...
+   ~~~~~~~~~~~~~~~~~~~~~~~~~~~~~~~~~~~~~~~~~~~~~~~~~~~~~~~~~~~~~~~~~~~
    + CategoryInfo          : SecurityError: (:) [], PSSecurityException
    + FullyQualifiedErrorId : UnauthorizedAccess
You can run the following command and then run the oh-my-posh command again
powershell -ExecutionPolicy Bypass
oh-my-posh init pwsh --config ~/.config/oh-my-posh/config.omp.json | Invoke-Expression
However, your current interface will have font errors, so you need to install a new font.
3. Install font for Oh My Posh
To install the font for Oh My Posh, run the following commands:
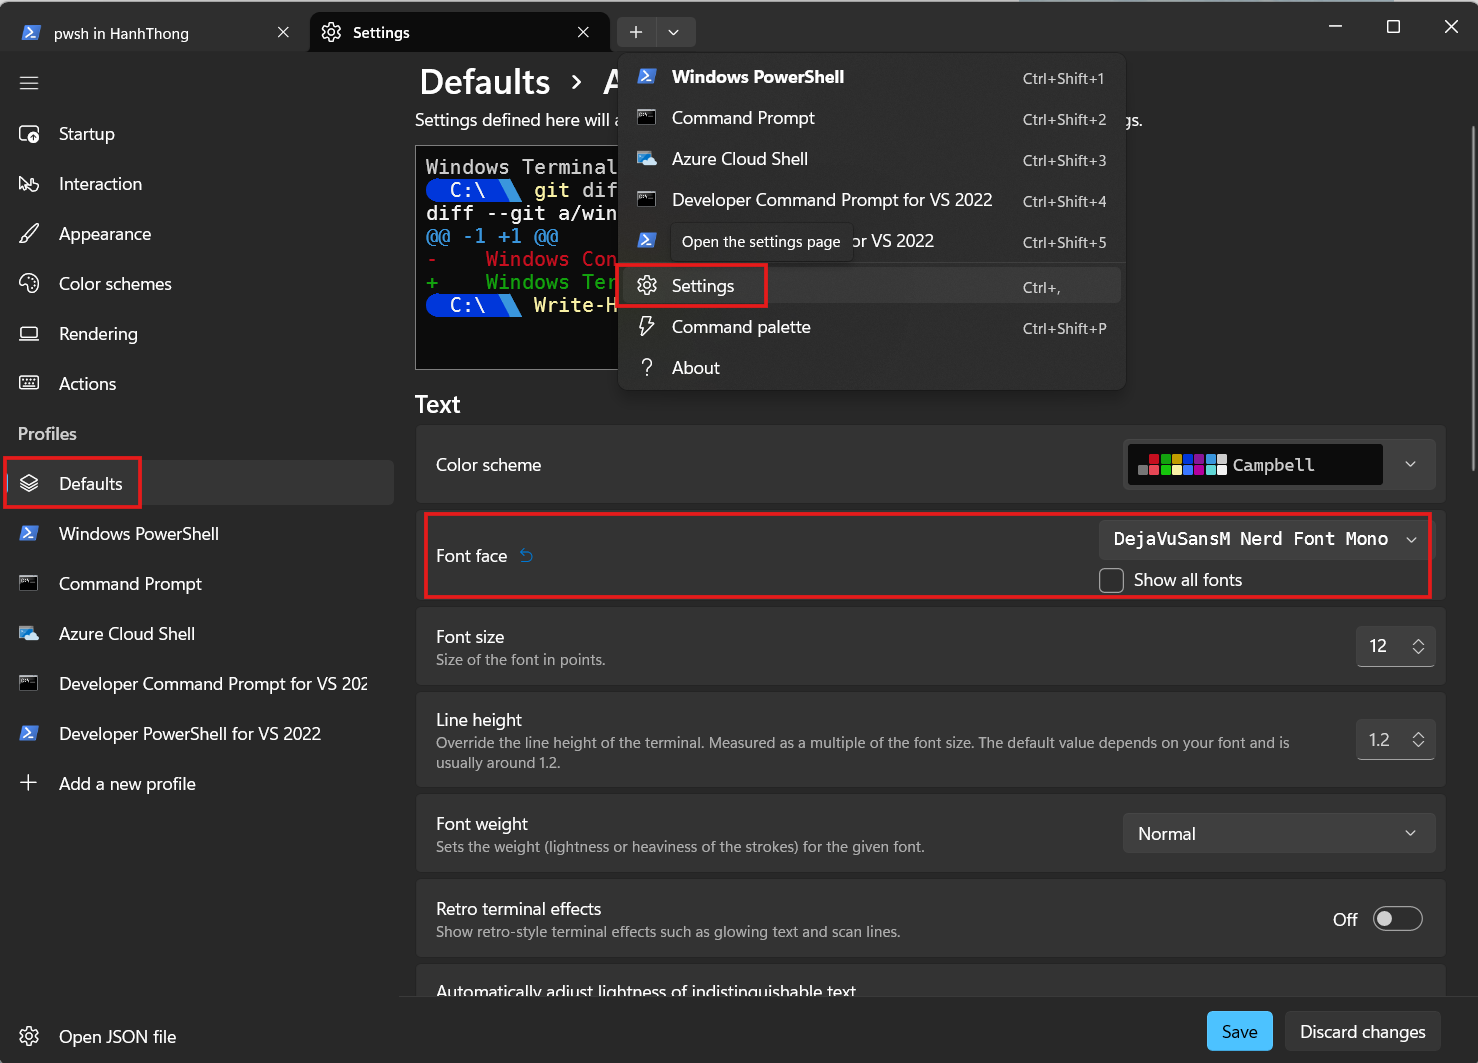
oh-my-posh font installThen you choose the appropriate font. On the terminal, you need to open Settings -> Defaults -> Appearance -> Font Face to select the interface that displays the newly installed font.

4. Create profile for Powershell
In the current step, when you restart Powershell, all previous themes will disappear. To save the existing settings, we will need to create a profile file like .zshrc, .bashrc on Linux. To create a profile you need to do the following:
Grant permissions on powershell
Set-ExecutionPolicy -ExecutionPolicy UnrestrictedCreate profile file using notepad
New-Item -Path $PROFILE -Type File -Force #Note that if you have already created a profile, you do not need to use this command
notepad $PROFILE
At this point, notepad opened, add the following commands, then save.
oh-my-posh init pwsh --config ~/.config/oh-my-posh/config.omp.json | Invoke-ExpressionNow, when you restart Powershell, all your themes and configurations will remain the same.
5. Install PSReadLine to automatically suggest commands
To install PSReadLine, use the following command
Install-Module -Name PowerShellGet -Force
Exit
Install-Module PSReadLine -AllowPrerelease -Force
Import-Module PSReadLine
Set-PSReadLineOption -EditMode Windows
Set-PSReadLineOption -PredictionSource History
Set-PSReadLineOption -PredictionViewStyle ListView
Set-PSReadLineOption -PredictionViewStyle InlineView
Now, when you type a command, if that command has been used before, there will be blurred text below to prompt the command.

At this time, you will also need to update the profile file by adding the following files:
Import-Module PSReadLine
Set-PSReadLineOption -EditMode Windows
Set-PSReadLineOption -PredictionSource History
Set-PSReadLineOption -PredictionViewStyle ListView
Set-PSReadLineOption -PredictionViewStyle InlineView
Conclusion
In this article, I have guided you through installing Oh My Posh with some tips for effective use, hoping to help everyone have a better and more effective working experience. After this article, you can learn more about some ways to customize the interface, add commonly used information such as npm, docker, aws .